Last Saturday (17th January 2009), My206Club attended Meguiar's Detailing Clinic by Hypercoat for Peugeot Club Malaysia (PCM). Many thanks to BlackDolphin for organizing such event.
Funny and yet something very meaningful, we were suppose to have the clinic somewhere in December 2008, there's even 2 different dates proposed by Hypercoat; Somehow something happened and the event was postponed to January and actually back then, the organizer was not really happy with it. But, there's a bright side to it.
1. More members are able to sign up and join
2. Because it falls on January and Chinese New Year is just around the corner; The "Show Car" is just in time for Chinese New Year~
3. The demo car(s), one for car wash only and another polish & wax demo (on the bonnet only) cars, was very very lucky to recieve a "standard" detailling package. (Chinese New Year "gift"? LoL~)
"Oh, did I mentioned, it's done by the masters? Yes, with the 's'"
Lastly,... check out the Meguiar's Calendar below for January 2009!!!
Peugeot 206!!!
Meguiar's Calendar - January 2009
Coincidence? I really don't know what to say, but put a BIG SMILE =)
(P/S: There's even another Peugeot 206cc poster on display inside the waiting area)

Waiting area with some products on display

The Gold Class Car Wash (Right), Smooth Surface Clay Kit (Middle) and "cannot see or remember what was it already"
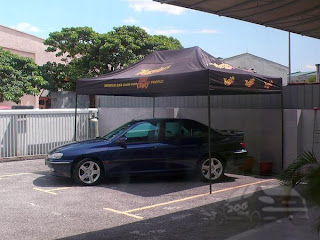
Show Car - Peugeot 406
(3 Days Ultimate Detailing)
The event started off with very informative and interesting presentation by Ms. Lowe. The presentation by her was excellent, informative, interesting and fun; she also tries to relates many detailing scenarios with real life scenarios (such as, facial terms, applying lotion, sunblocks, etc). Ok, I'm not so good at explaining as her, so I'll keep it simple; Applying wax is important as it provides "protection" to your car, think of it as applying lotions, sunblock to your skin to protect your skin.
The presentation was also very well done with many interesting parts and with some jokes to keep the audience entertain and interested. They also did not emphasize too much on purchasing their product, rather, more on understanding their products and the range of products available.
Another part which she has done well is explaning different range of products even for consumers, such as,
1. Gold Class range (slightly more expensive)
2. NXT range (average)
3. Classic range (cheaper)
She also highlighted that if one is more budget conscious and wanted to give Meguiar's a try, can go for the Classic range.
Anyway, the presentation was very well done. The presentation ended with a "bonus" presentation by her "SHIFU", Mr. William, explaining the more technical parts and sharing his experiences and advice, with additional bonus of "Paint" knowledge for us~
After the presentation, we moved on to Car Wash demonstration where they explain to us the "proper" way and technique to wash our cars. The lucky car for this demo is Andy's BB Lion, and he's also requested to "demo" his washing skill while monitored by them and give advice to him while he is performing the "demo".
 Andy in "action"; Giving his lion "tender loving care (TLC)"
More... more... =P

Two Bucket System; 1. You dip your wash mitt inside the Clean Water bucket to remove any dirt/contaminants.
2. Dip your clean wash mitt into the Shampoo bucket to "get" the new Shampoo.
(These are steps to prevent swirls marks on your car)
Clean & Shiny now~
(Actually there's a lot of swirls marks and water marks =P)
Next, we all move on to Eugene's Premium BB Lion which has already given a car wash when we reach; It is now time to demonstrate on Surface Preparation (Claying, Paint Cleaning) and also Polishing and Waxing.

Getting Ready...

Getting more anxious now...
(Where are you guys???)

After Claying...
(and various "touching" & "molesting" by the members to test the "smoothness"... poor Lion)
The swirls marks...

Preparing for "ScratchX" demo...


After "ScratchX" demo...
Before (Left) & After (Right) Polish...
While Eugene's car is under "demo", we notice Andy's BB Lion is receiving "special treatment" by the MASTERS~It's said that it's very rare to see all the "masters" working on a car; Oh My... how lucky!!!
(I think I saw Andy jumping up and down in joy =P)
Next up, the masters went and worked on Eugene's Premium BB Lion~
Well, on the below picture, you can see the different moments when doing detailing~
There's the "serious" moments
Then, there's some tough times...
Finally, most important of all, the Happy moments, the joy of detailing~ =)
(Especially when you see the results)
Before we left, there was actually a lucky draw event (but too bad many already left, but they're real lucky cause most of their names were called at the beginning!). So all of us get a FREE gift (from vouchers to products). Poor Andy, his name is "missing", luckily the pretty lady known as Esther pity him and give him another chance.
Most of the members left with many bags of products, hehe; Guess there goes our Chinese New Year pocket money and shopping... Those need to prepare money for "Ang Pao", maybe can consider donate in form the of "products", =P
Lastly, below is a shot captured by Andy when he reach home...


